Using native SQL Queries against data sources can come with certain advantages. Chief among those advantages is the ability to push data transformation tasks to the data source level, rather than on Power Query itself.
Excel of course is just a flat data source without natural ability to be queried with the SQL. But with the aid of Open Database Connection Driver (ODBC), we can find a way around that.
In this first part of my article on the subject, I will describe the basic steps to achieve this feat.
Setting up Excel Data Source on ODBC
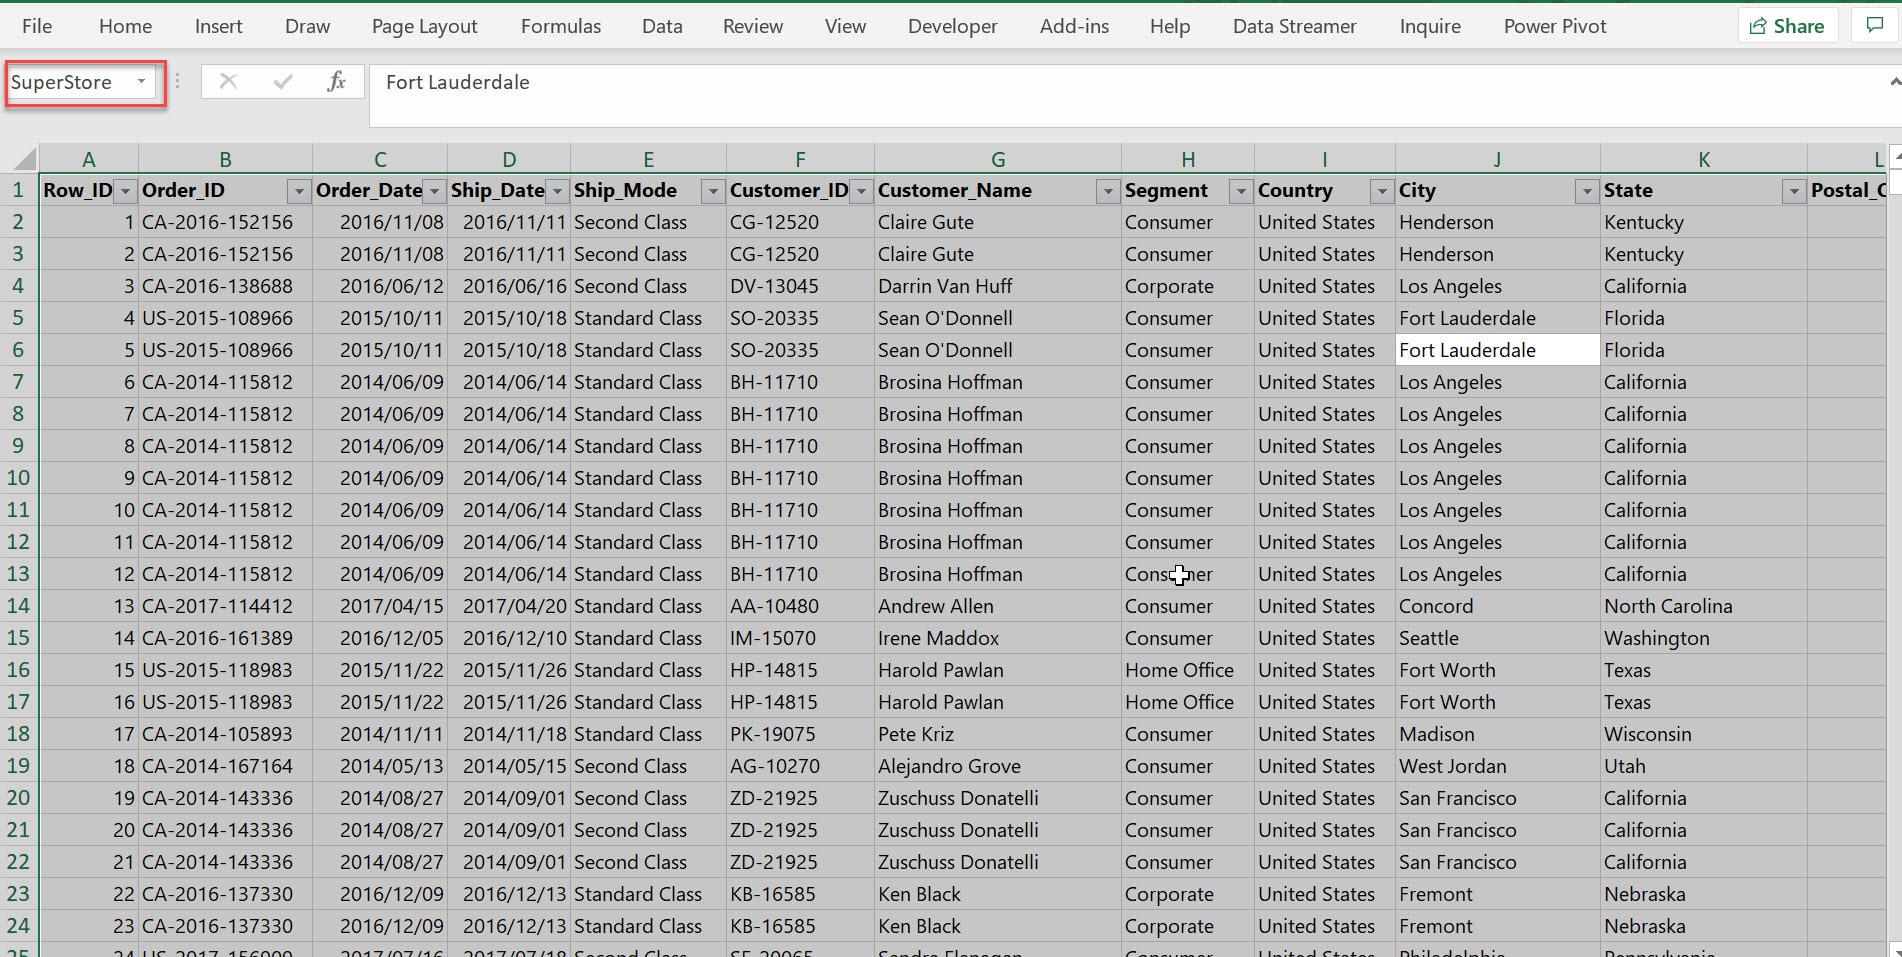
- Create a Named Range: Highlight your Excel Data Range, go to the named box in Excel and type a descriptive name of your data.
Note that spaces are not allowed for Excel Named Ranges. (There are ways to programmatically create a dynamic range using Excel formulas you can lookup online. I will probably include this in the second part of the article).
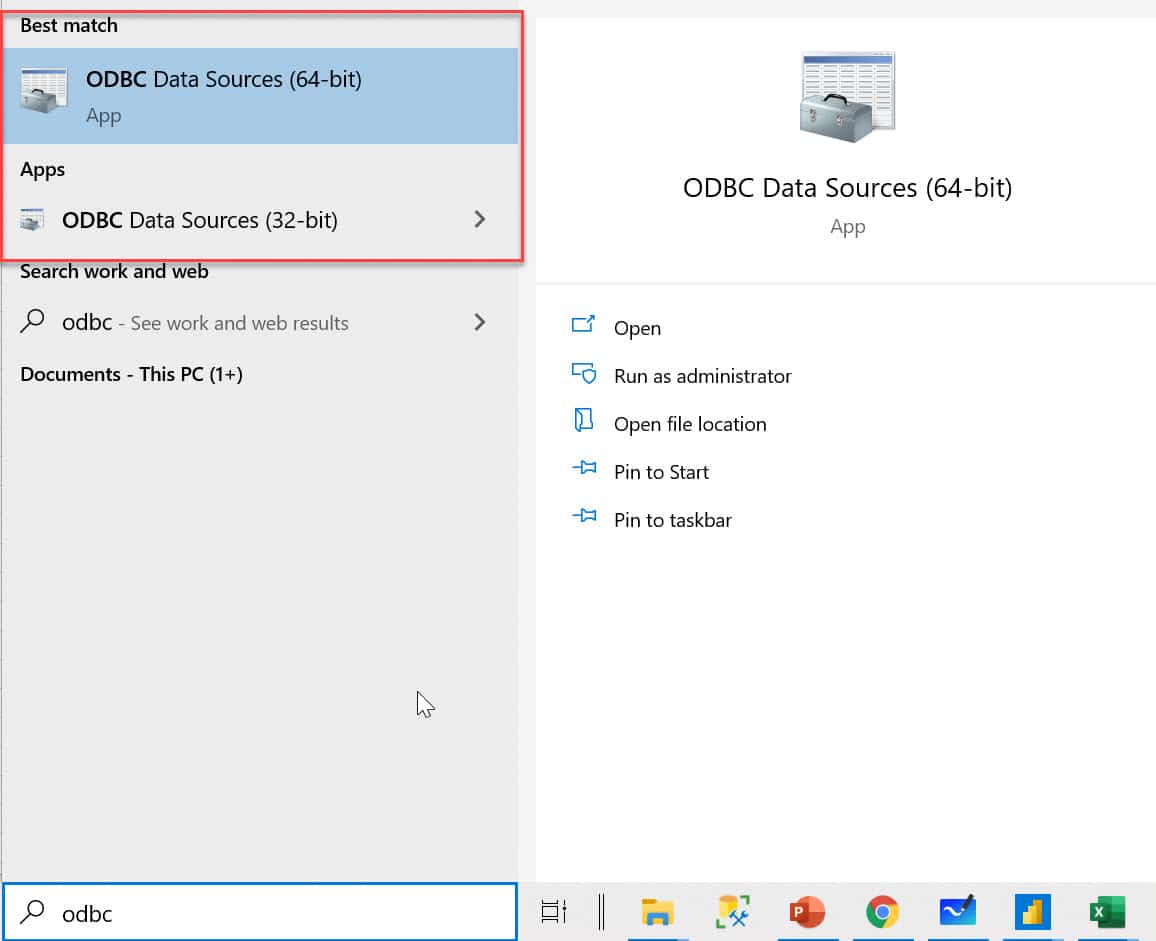
- Search for “ODBC” on your Windows Task bar and select the ODBC driver that matches your version of Microsoft Office.
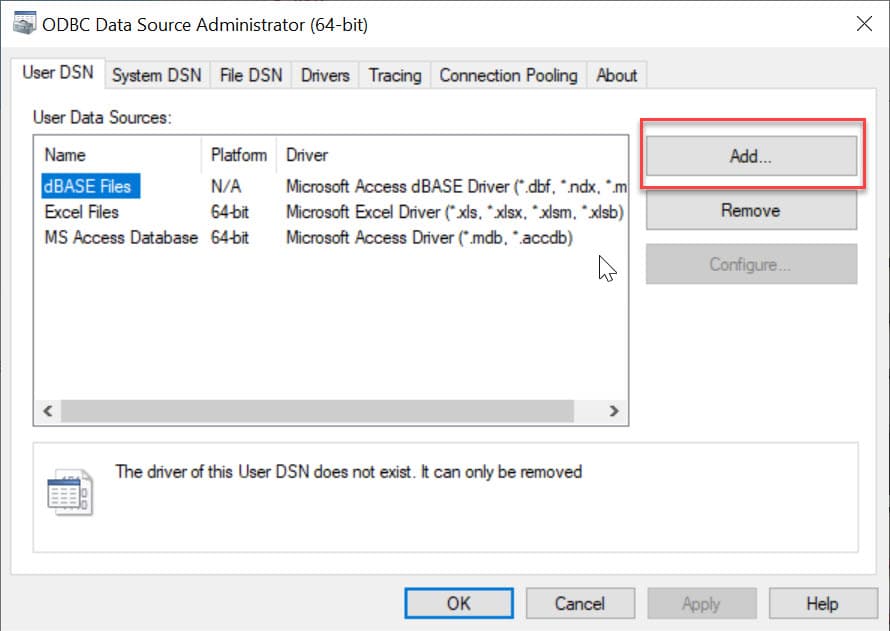
- Under the User DSN in the ODBC Set up window, click Add.
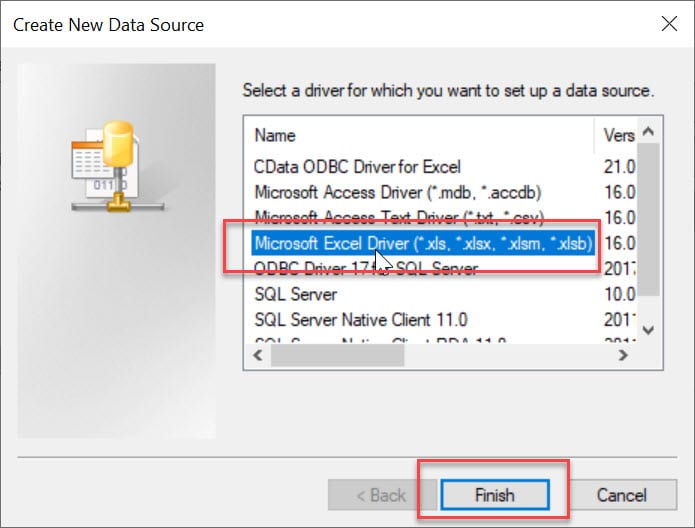
- Select Microsoft Excel Driver and click Finish. You are not done though.
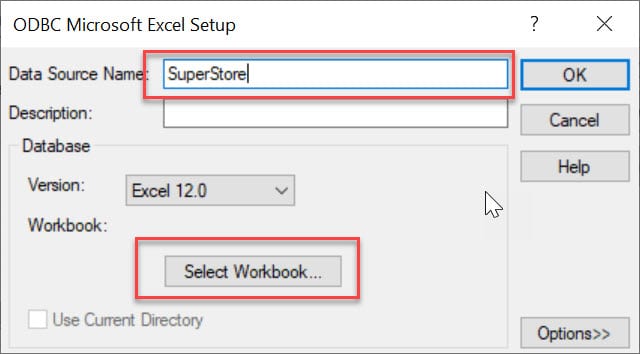
- In the Data Source Name, enter a name the click on Select Workbook.
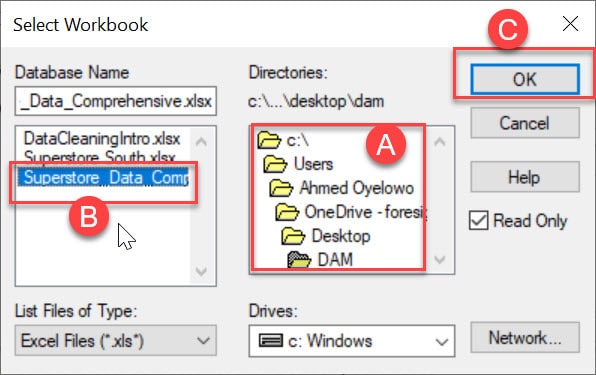
- Browse to the directory that contains the file, select the Excel Workbook then click OK
- Click Okay again and again.
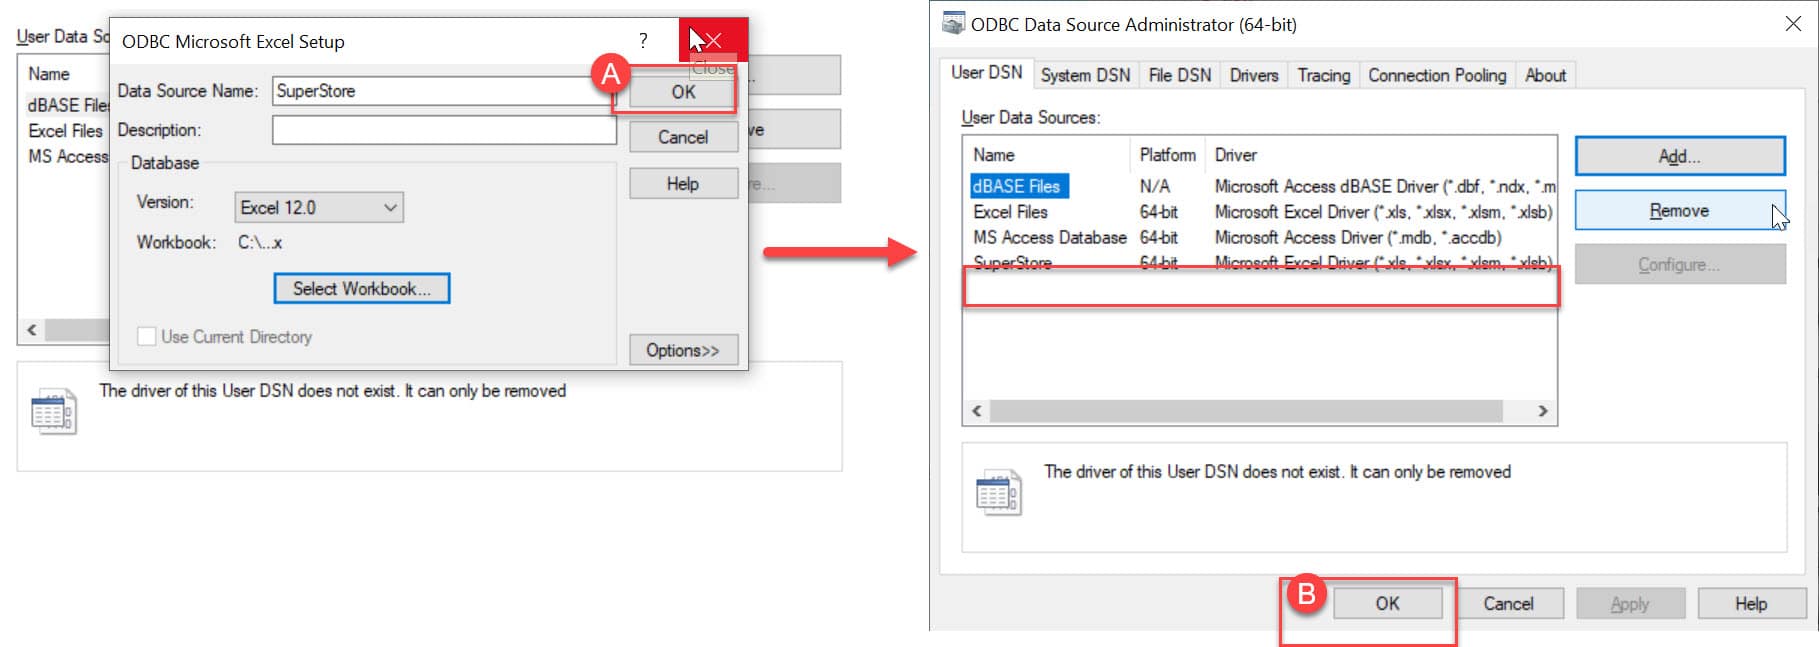
Now the Excel file has been set up and ready to be used by ODBC connector on Power Query.
Connecting to the Excel Data Via ODBC.
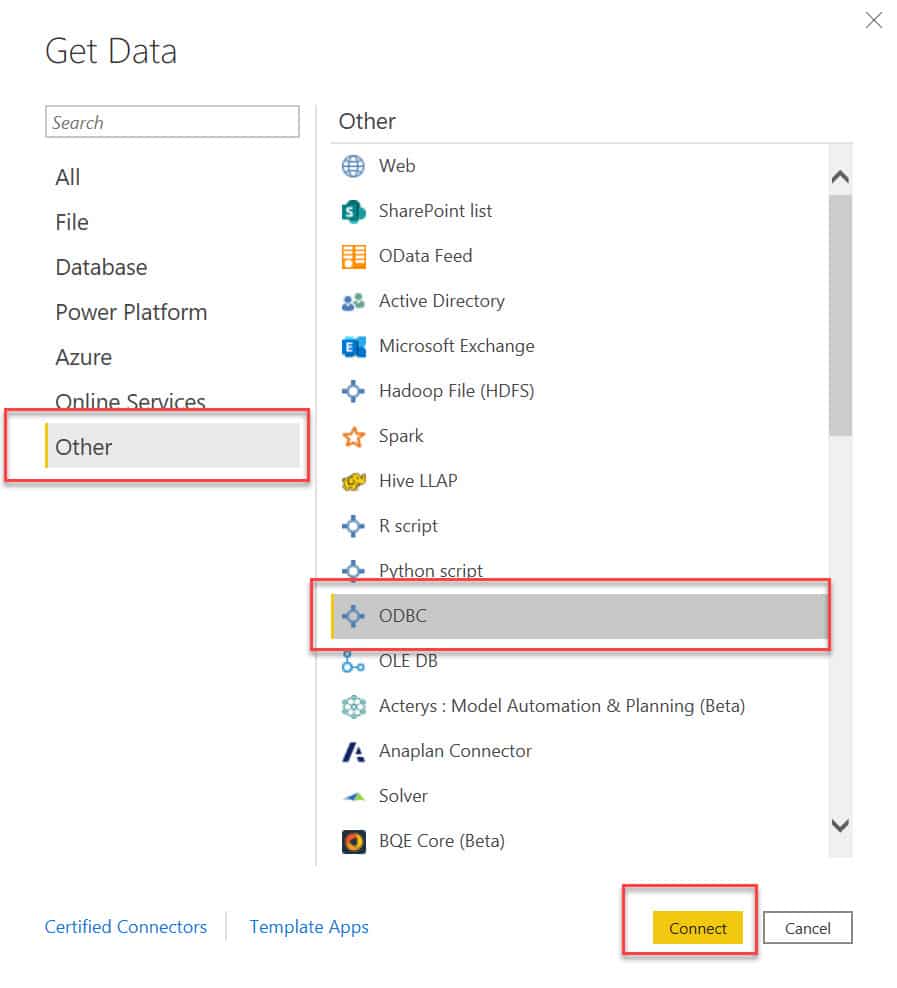
- From Power Query Get Data (on Excel or Power BI), select Other and connect with ODBC
- On the Data Source Name dropdown, select the Name earlier created on the ODBC Driver Administrator then click OK.
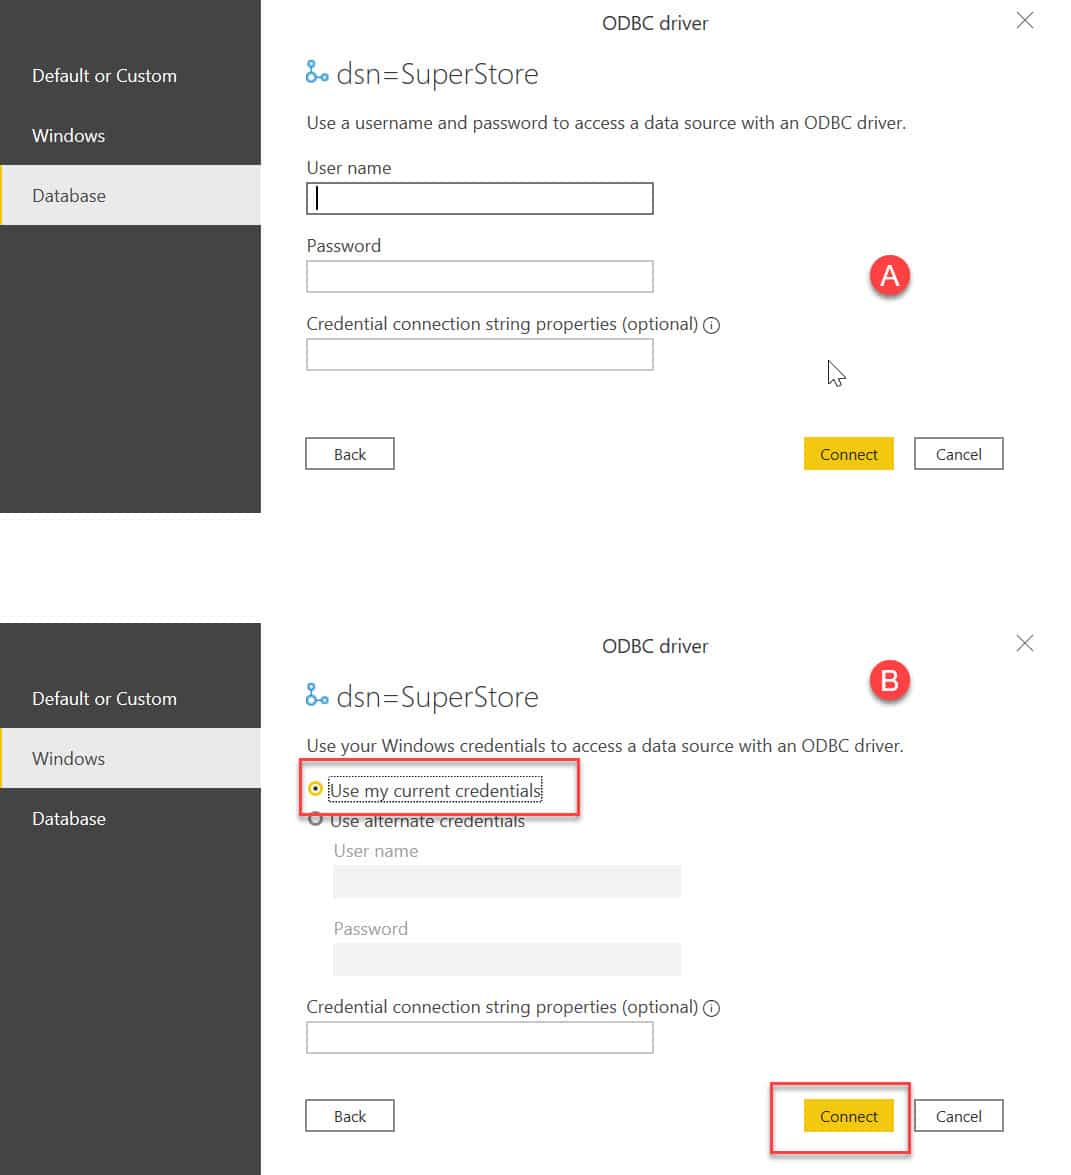
- Select your connection mode. If you specify database, the use your PC Login details. Here, I’ll just go with Windows and use my current credentials.
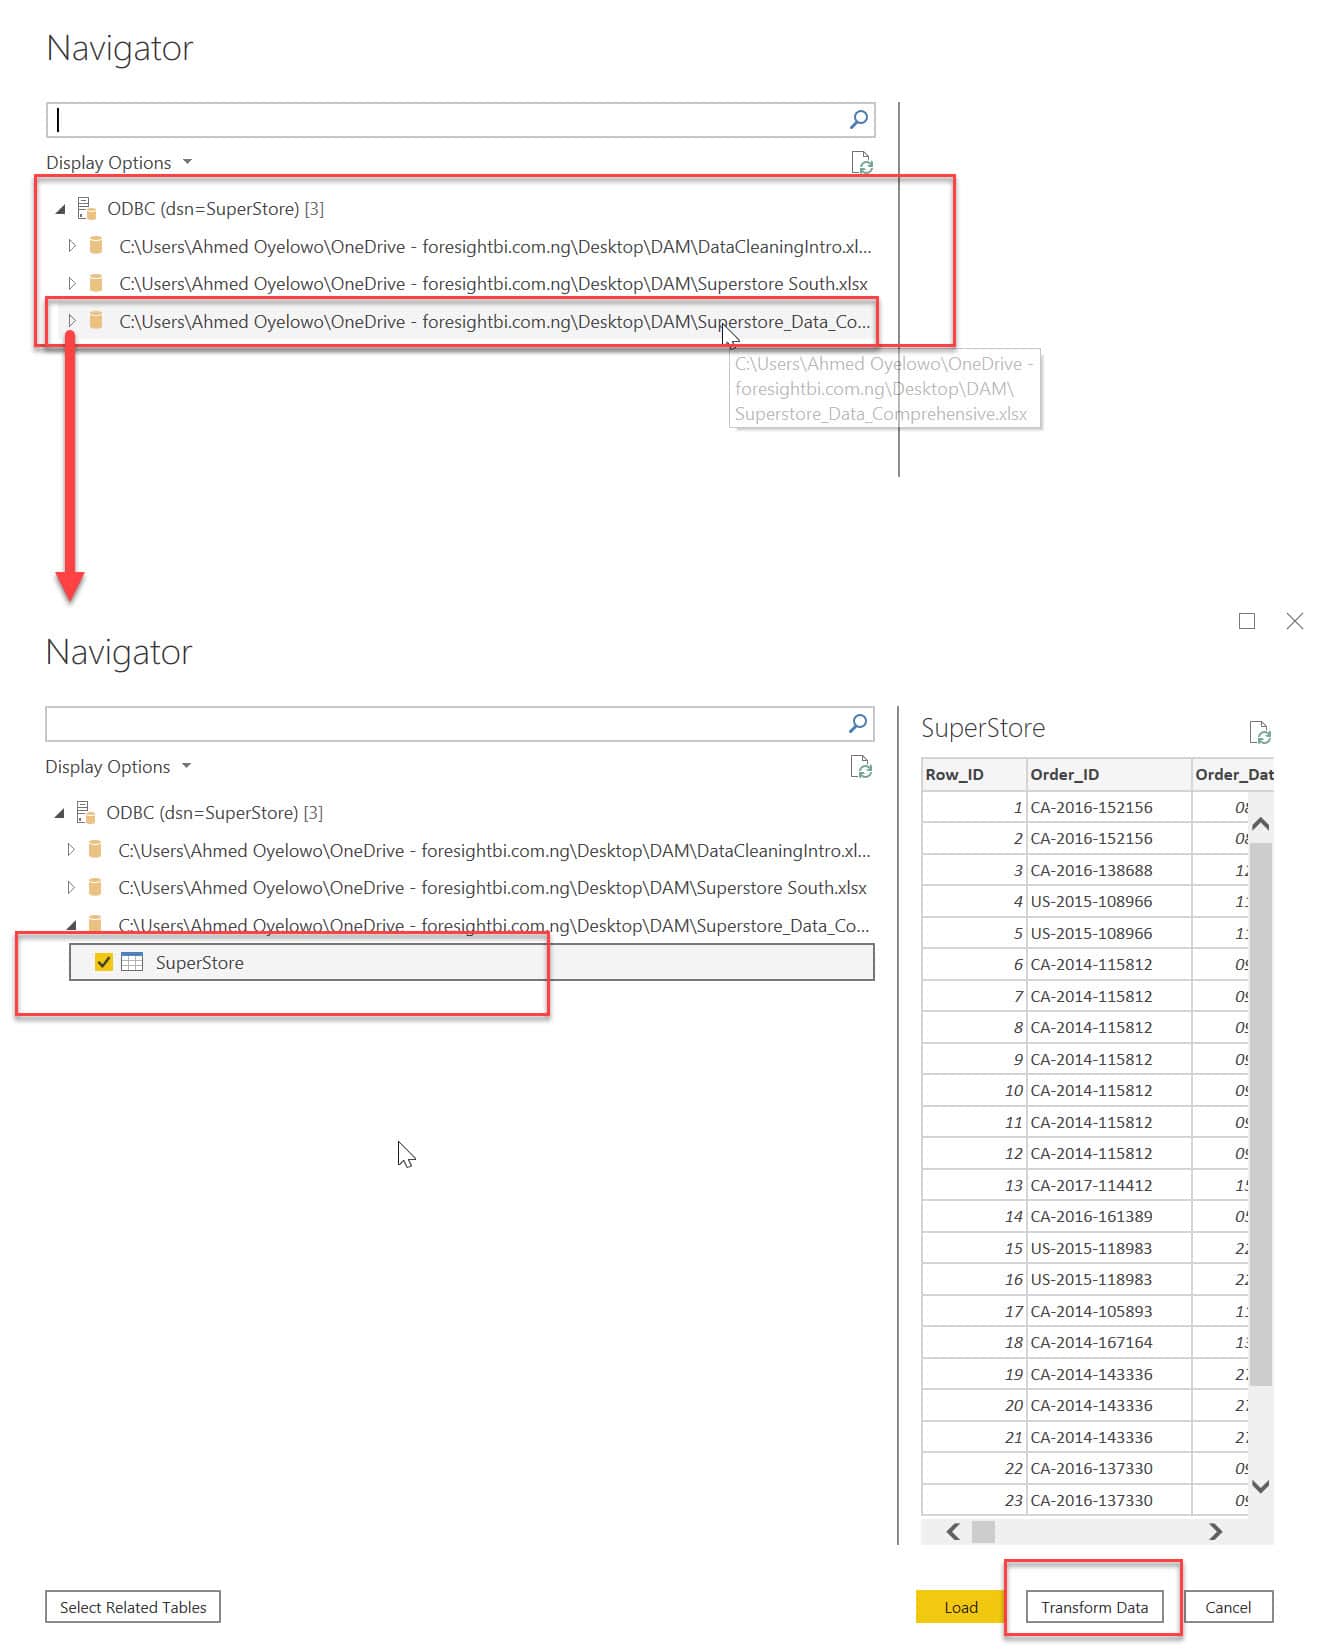
- In the Navigator, you will find all files in the directory where your “Excel Data Base” is stored. Just expand on the right file and click on the created named range seen on the source. You can then click on Transform Data to launch Power Query Editor.
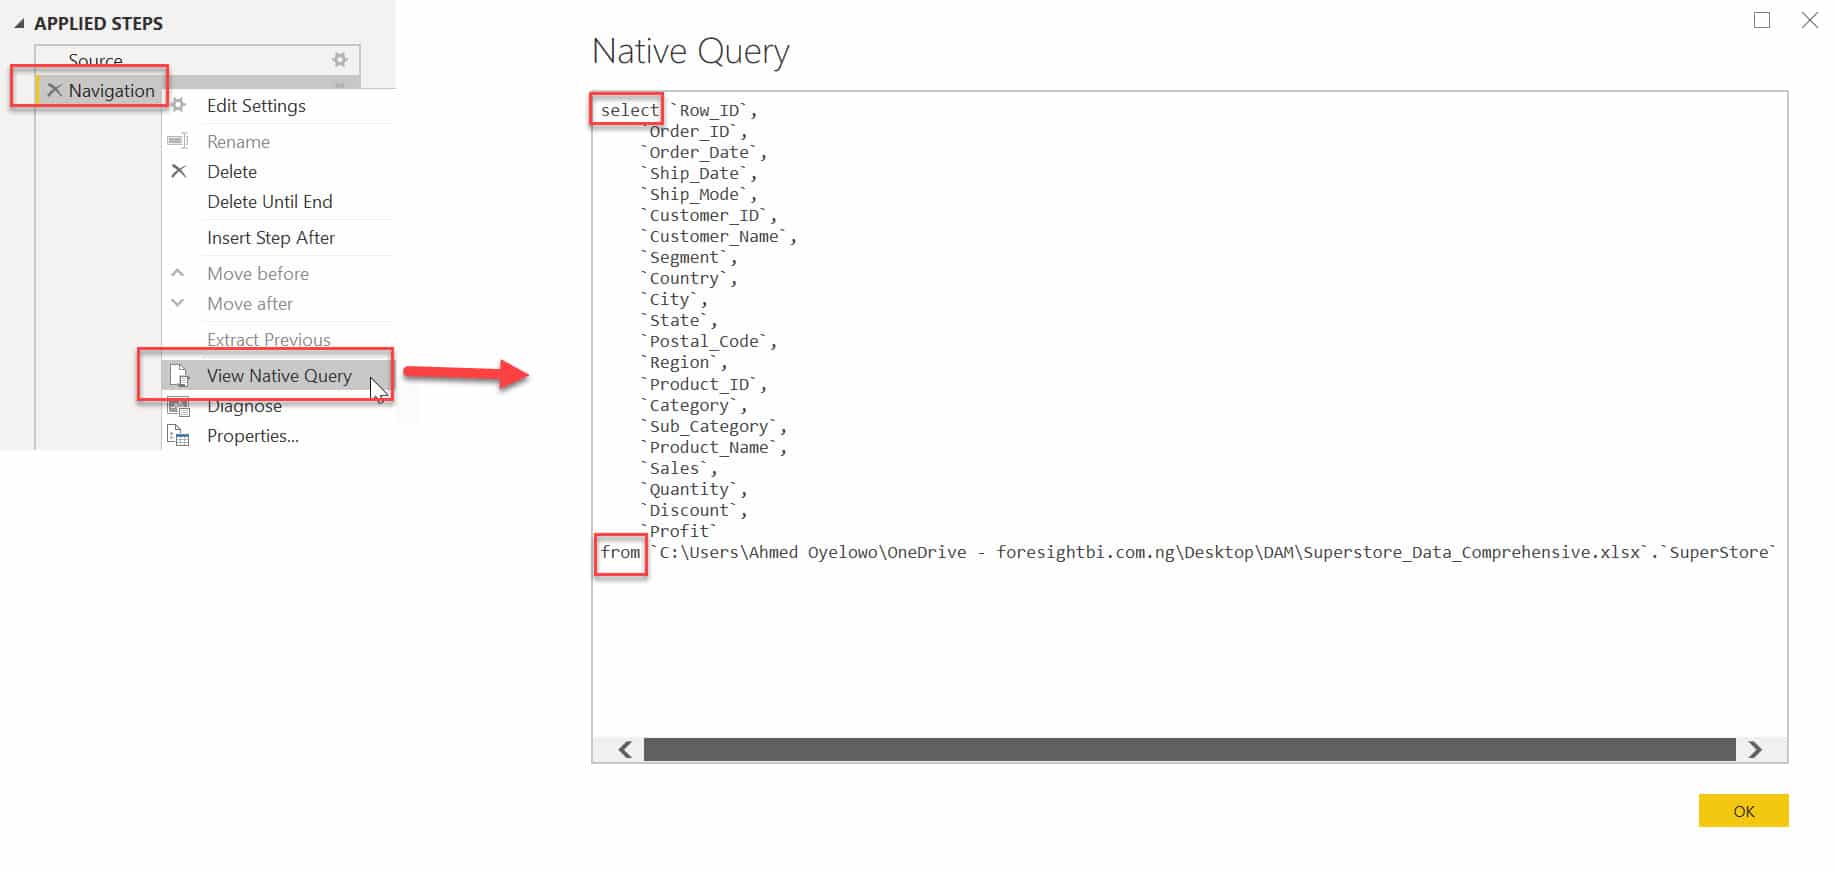
We can do a quick check by right-clicking on the Navigation Step in the applied steps area in Power Query to view the Native Query.
What Next?
There are still other areas to touch as far as using Excel ODBC connection on Power Query is concerned. What are some of the limitations? How do you write out your own SQL Queries? Will Query folding always happen for various Power Query Transformation steps?
I will share more details on these in the next piece, while hoping that the Power BI Community also contribute on this subject.

