“Bookmarks”? Yes, bookmarks.
You know those thin strips in between books with the main purpose of referring to a particular page, which makes it easy to catch up later? Exactly.
Bookmarks in Power BI does the same thing but with more interesting features. Bookmarks are not one of those necessary features you have to use whenever you are working on a Power BI project so many people pay it no attention.
Although Bookmarks are not necessary, using it makes your report even more effective to navigate through & work with. Maybe you’ve caught a glance of it once or twice & wondered what it’s for? Well, you’re in the right place.
Bookmarks’ function is to save a particular view which you can refer to later.
For example; while exploring your already done dashboard, you come across an interesting anomaly which isn’t a part of the assignment given but then you’d like to show someone this interesting anomaly during your presentation & you do not want to forget, Bookmarks is the go-to feature for this.
Let’s create one bookmark together to understand the concept better:
For Bookmarks to work, you have to have your dashboard ready on the report page. So, I already went ahead to;
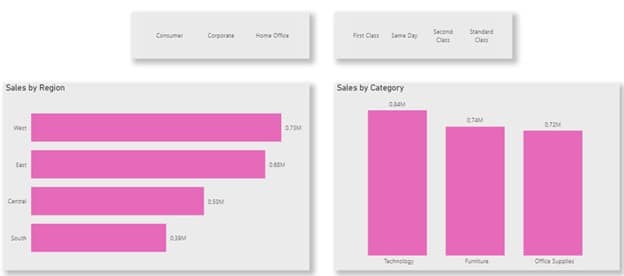
- Create a report as shown below using the Superstore data set
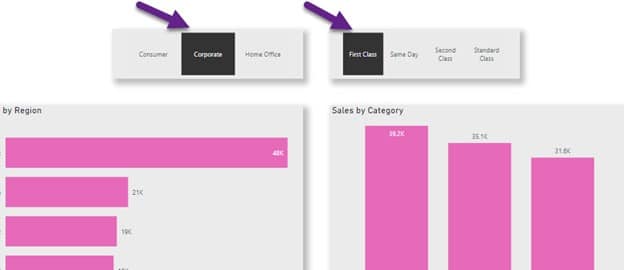
- Apply the filter you’d like to refer back to (i.e. Bookmark). e.g. I applied filters using both Slicers (Corporate & Firstclass);
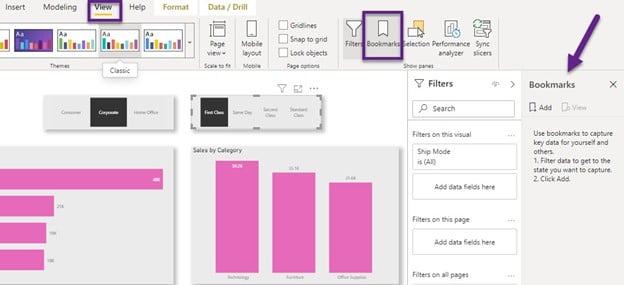
- Navigate to the View tab and click Bookmark. The Bookmark pane appears on the right side of the report page. This is where you can access your bookmarks for reference.
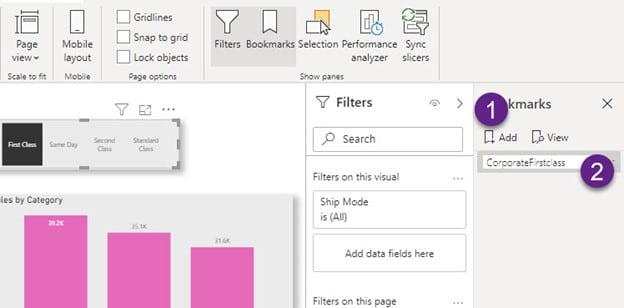
- Click ‘Add’ on the Bookmarks pane to add a new bookmark for our current view, rename as desired (I used ‘CorporateFirstclass’) & hit Enter
We have now created our 1st Bookmark by registering this view.
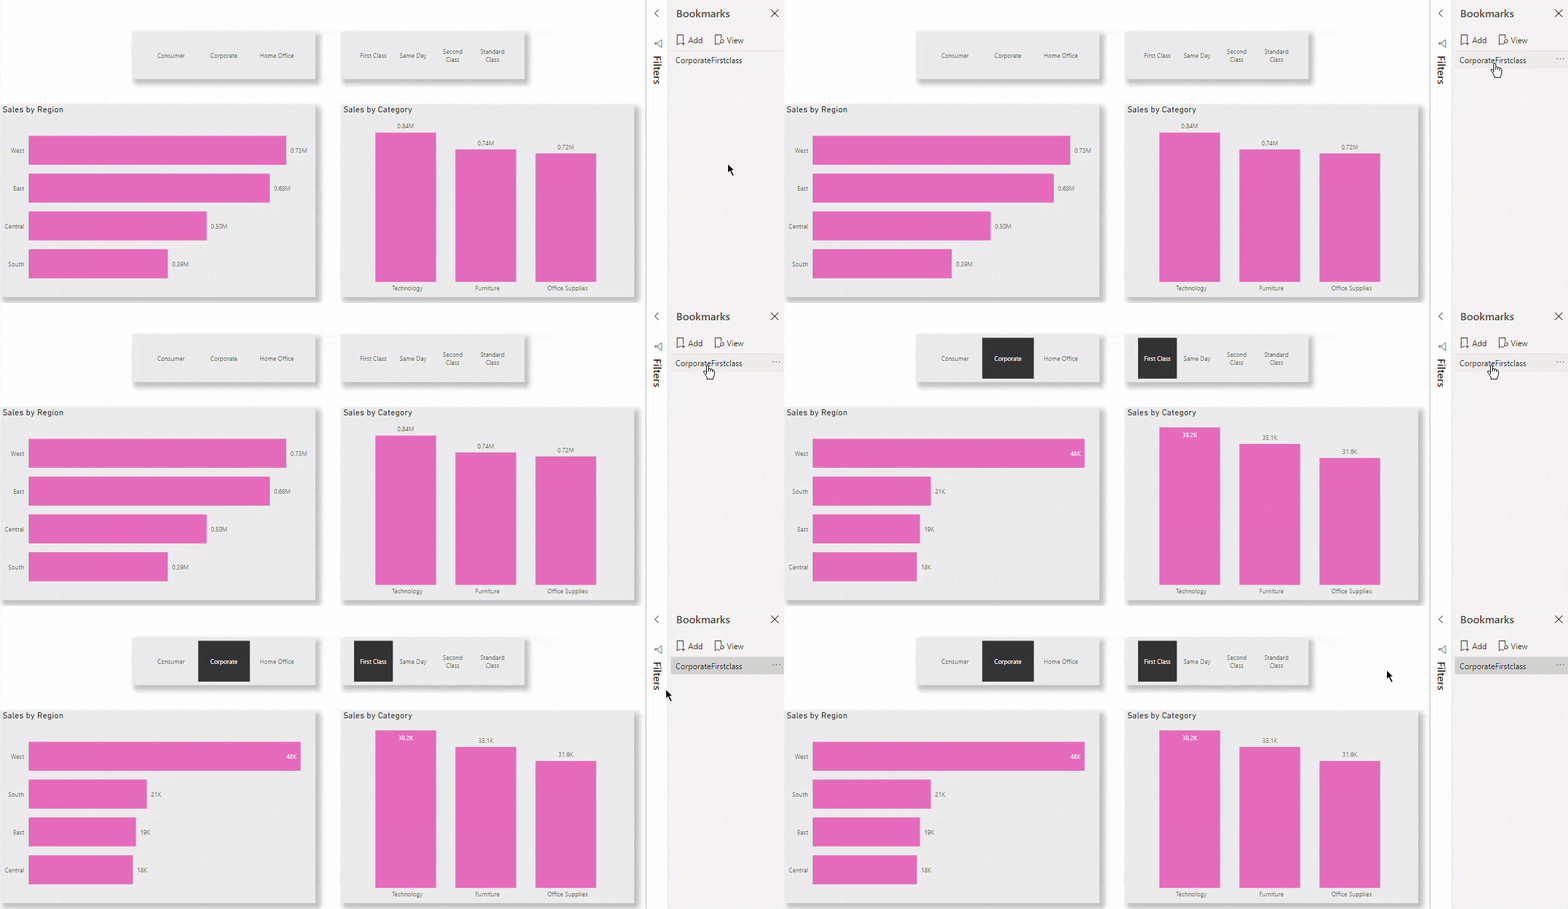
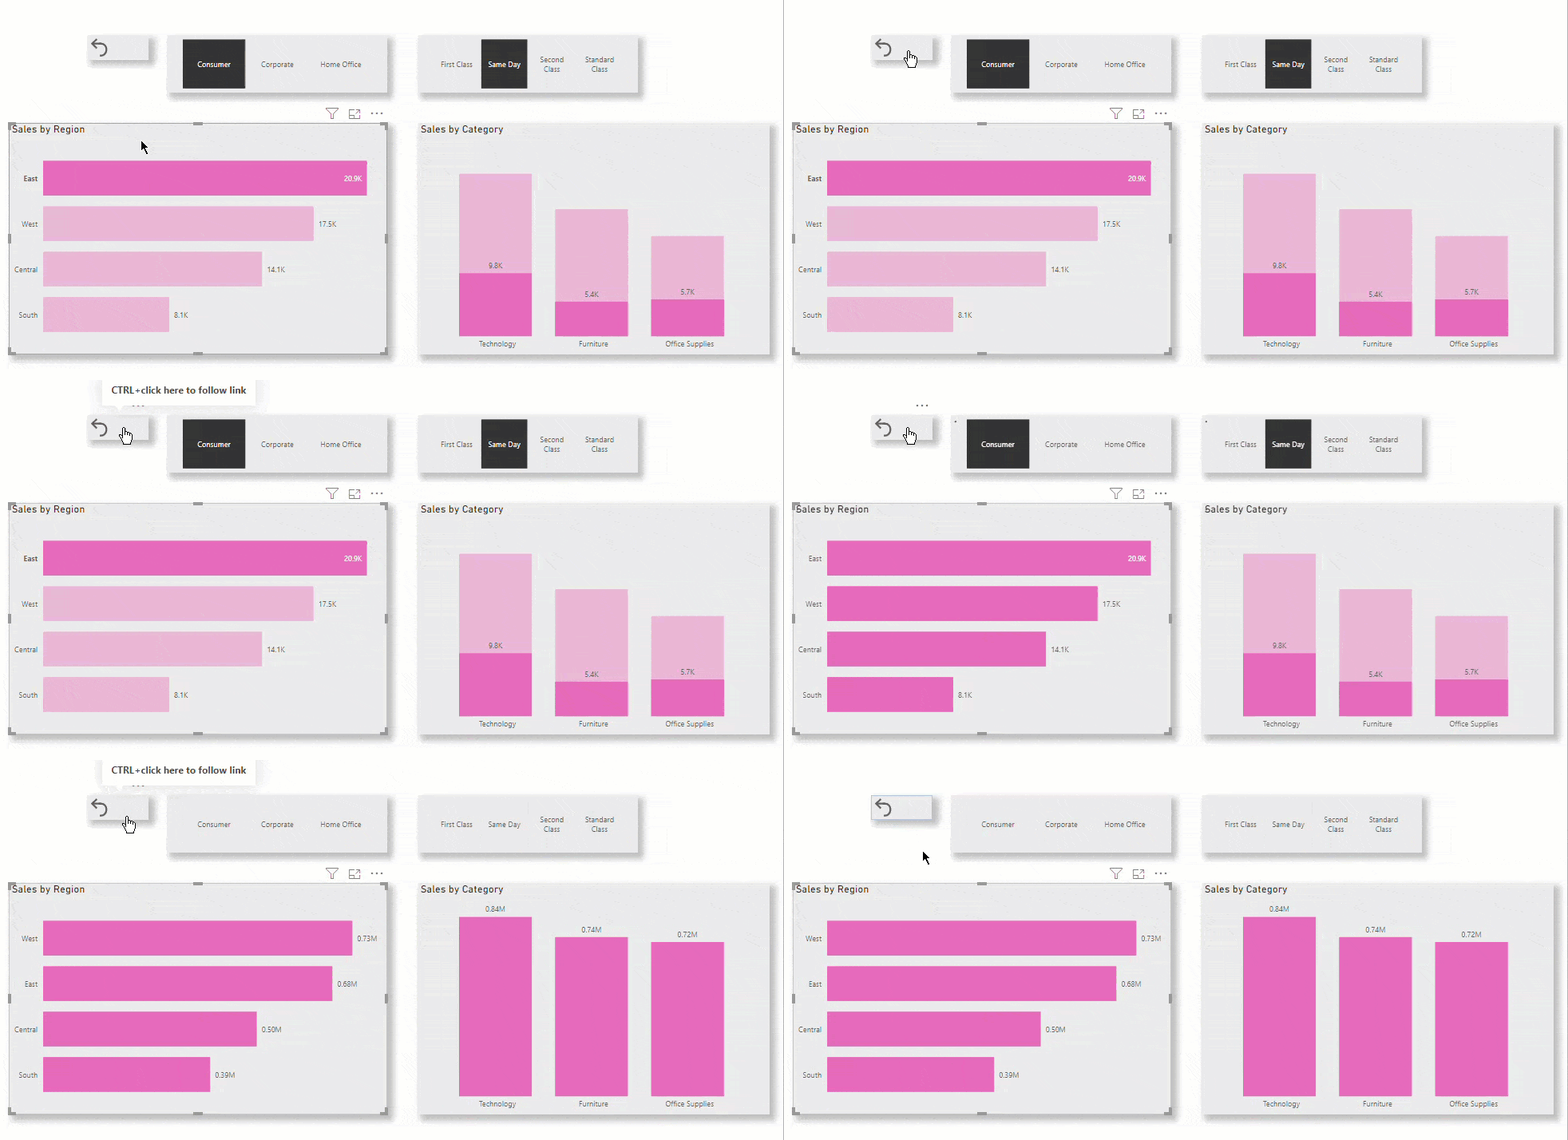
If we disable the filters applied from the Slicers & we want to come back to this view later on, instead of clicking ‘Corporate’ & ‘First class’ individually, all we have to do is navigate to the Bookmark pane and hit the bookmark (CorporateFirstclass) as shown in the gif below.
See? Easy!
But that’s not all, we can also decide to create another bookmark (NB: you can create more than 1 bookmark for a report) to attach to a ‘Home’ button.
This Home button will act like a default button which is useful for when you’ve applied more than 1 filter to the dashboard & you’d like a shortcut to take you to your default/original report view.
Let’s do this;
- Make sure that your report is in its original view
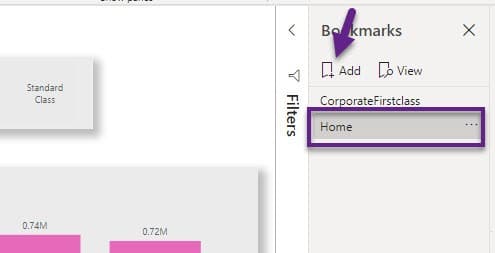
- ‘Add’ another bookmark the same way we added the first one and rename as ‘Home’
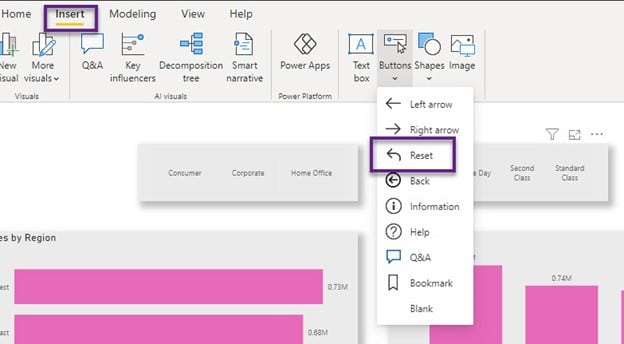
- Navigate to the Insert tab and select any button of your choice in the ‘Buttons’ option (I decided to go with Reset because it fits the theme) as shown below.
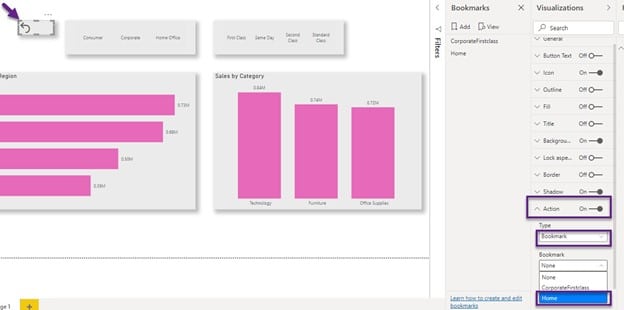
After placing this button in your desired position, it’s time to create a connection between the button and the Home bookmark. To do this;
- While the button is selected, navigate to the Visualizations pane, select Action, select Bookmark under Type, then select Home (i.e. the Home button we recently created) as shown below
What we just did is create an action for the reset button, so that once we click the reset button after applying various filters, it takes us to the default display of the report as demonstrated in the gif below.
Just like that!
One last function of Bookmarks; it can be used as a form of slideshow for your report.
The way this works is; you’ve created say 4-5 different Bookmark views and you’d like to display these views one after the other, just like a slideshow. Bookmarks to the rescue.
To do this;
- I went ahead to add 2 extra bookmarks to the report (ConsumerFirstclass, HomeofficeFirstclass).
Then, I dragged the Home bookmark to the top of the list (doing this because our slides appear the way it is arranged on the list).
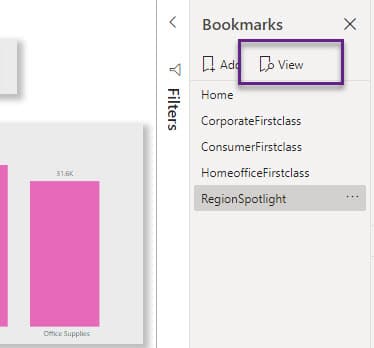
- Next, hit View in the Bookmarks pane;
Notice how the report view has changed after.
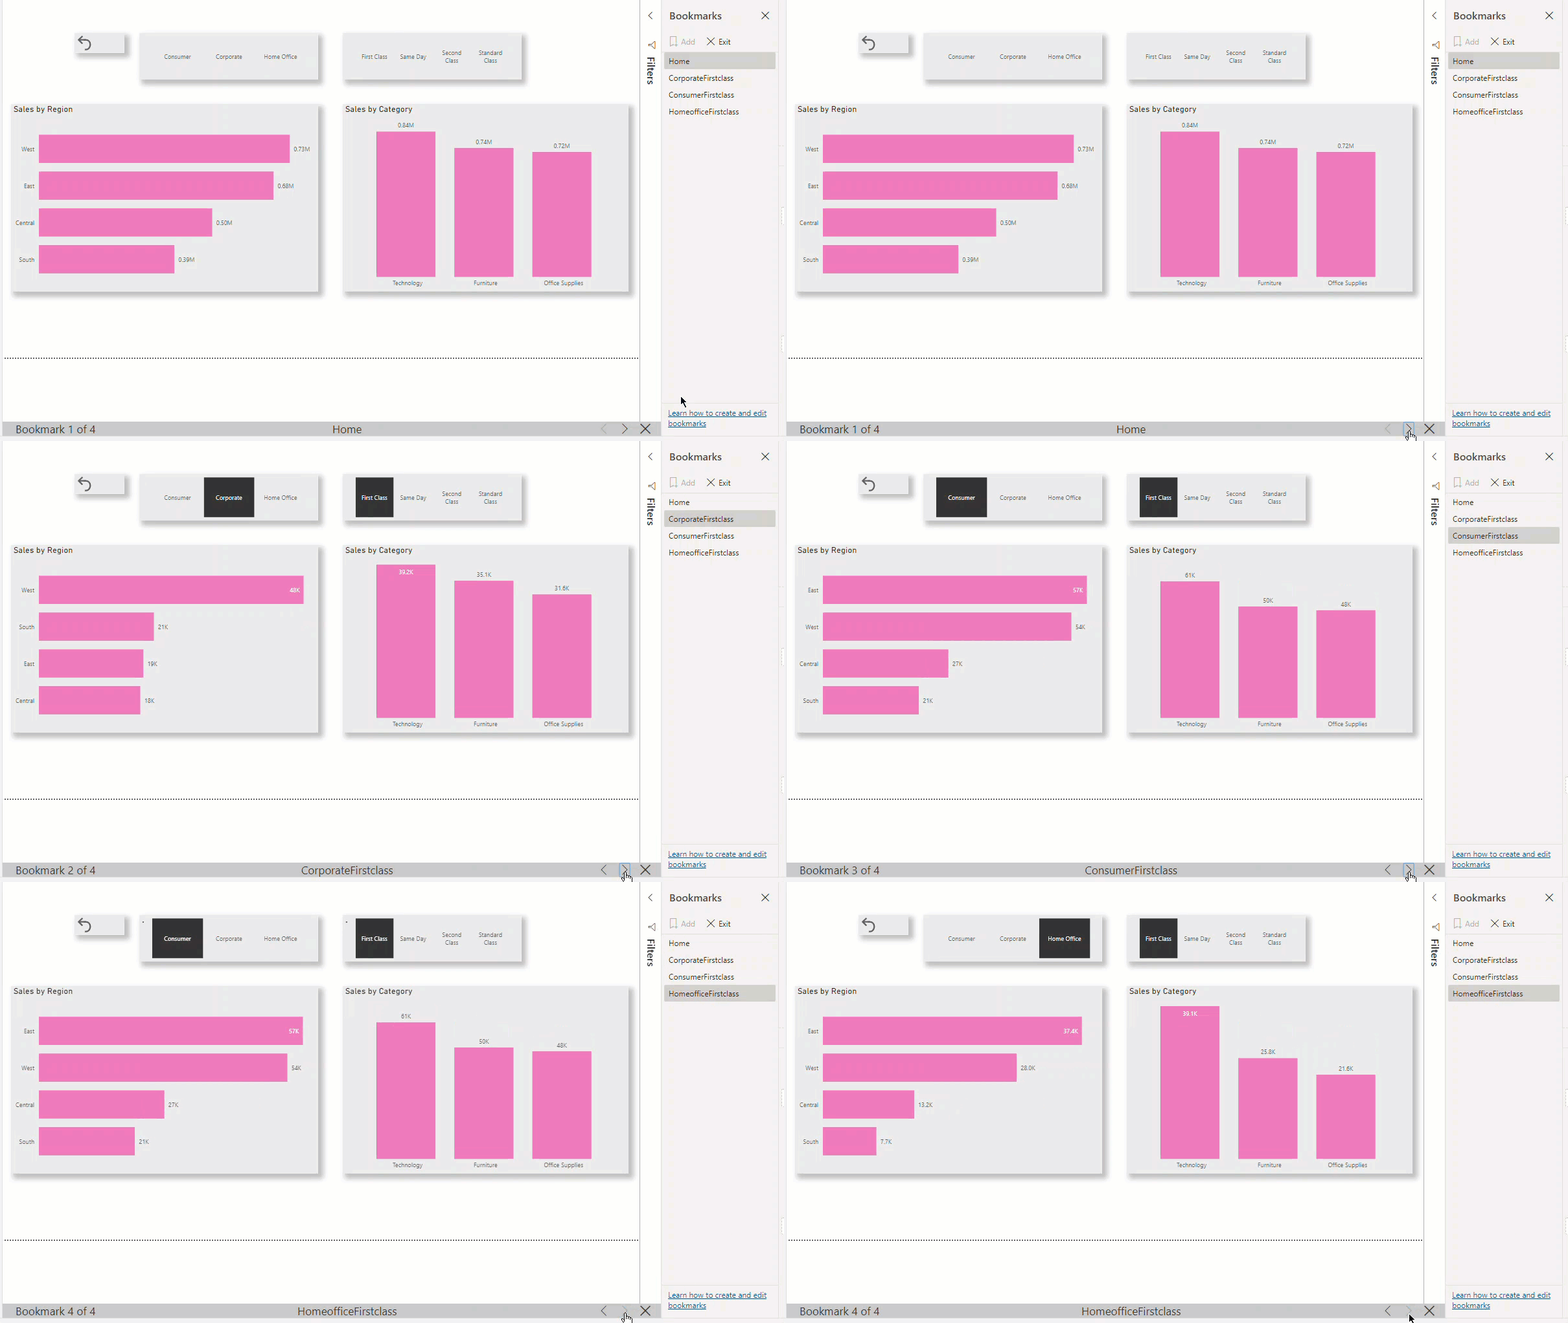
We can then start to slide through each view by clicking the right arrow (>) beneath the report as demonstrated below.
There! We successfully created our own slideshow using nothing but bookmarks. How easy was that?
Conclusion
Now that we’ve learned the functions & the how-to of making use of bookmarks, I hope you understand & make creative use of it in the subsequent reports that you create.
See you next time!

